
Once all the pieces have been separated from one another by a single thread (or in some cases 2-6 threads because I wasn’t able to remove and then cut along that single-thread channel), the next step was to iron all the pieces, and then find the center of the 80″ long by 27″ wide piece that will be the body of the shirt. So first I folded it in half lengthwise, each half 40″ long, and then width-wise, to find the center, where the neck cut-out would be.
I readied my scissors.
And then I chickened out.
Carpentry and sewing have this in common: measure twice, cut onc. Once you’ve trimmed a piece of fabric, there’s no going back. I contacted a friend on Twitter, @WanderinBritchz, and asked for advice:
And of course she’s right. You’ve got to put in a marker of some kind to indicate where the middle back is, and where the middle line/shoulder line is, and the best way is to put in a line of basting stitches in a contrasting color. You now have clarity about where the centers are, and things don’t go too far off course. Drat — that’s a LOT of extra work.

Almost as much as cutting the front and the back of the shirt apart, and then sewing the shoulder together. But then I’ll be able to locate the center front much more precisely, and get a much better looking “front of shirt” … with that extra work. Double-drat!
So I punted. I made the collar and cuffs of the shirt first — some basting stitches with the sewing machine, then some back stitches by hand to back up the basting stitches, followed by felling stitches by hand to hold the seams closed, followed by turning the cuffs and collars inside out. These seams are a little stiffer, and a little larger/thicker than my typical sewn seams, but they’ll be more solid and more reliable in a linen shirt, and less likely to unravel. Each cuff and the collar gets folded in half, and then one side gets folded back on itself to form the interior edge of the piece. The two opposite ends get sewn together with a half-inch seam allowance; one part of the seam allowance gets trimmed, and then the other half gets double-folded over-and-under the trimmed edge, and felled in place. And then the whole collar or cuff gets turned inside-out, and ironed and pressed.
Done. The collar and cuffs on this shirt are going to look really nice, and the smaller cuff is only 1/4″ smaller than the larger. We’re making progress here on symmetricality.

So far, I’ve done virtually nothing toward assembling the shirt other than the collar and cuffs; I’ve only taken pieces apart, and sewn three of them into their preliminary finished forms. It took nearly eight hours to wash, partially-iron, thread-pull, and then cut all the pieces to make the shirt, and another hour and a half to make the two cuffs. Separating the front and back of the shirt, and then sewing them together is the next step… probably. I could also give myself over to making the sleeves next, though, and then it would be clearer how I’d have to assemble the shirt body. Either way — shirt body first, or sleeves first — I think I’ve decided that using basting stitches from the sewing machine and finishing stitches by hand, is the way to go. I just wish I’d been able to order white linen thread; there seems to be none for sale at the moment due to the pandemic. That means using either waxed linen thread of a different color, or waxed cotton thread, or polyester. None of those is ideal. I’ll think on that more before my next go-round with the shirt.
I mentioned that I was working with Bernadette Banner’s video on pirate shirts as I made this shirt, but one of the things she didn’t include was a cutting diagram of how to break up a bolt of cloth to form a single shirt.
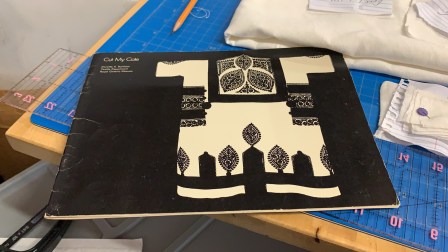
So I went to the handy resource of Dorothy K. Burnham’s book from the Royal Ontario Museum called Cut My Cote. The idea in this book is always worth remembering: all cloth is produced on looms that are squares, so almost all fabric in the world is made up of rectangles and squares, so the most ‘efficient’ clothing designs are made of triangles, squares, and rectangles. Curves are a relatively new (and relatively inefficient) way to use cloth, and weren’t common in most medieval or renaissance era clothing; they didn’t become common outside of supreme upper class fashion until the Industrial Revolution made possible large-scale textile production. This book is filled with examples of how different cultures have cut and shaped single bolts of fabric into garments, whether in China or among Native American peoples, among French-Metis frontiersmen or British railway workers, Serbian farmers or Afghani herdspeople. A lot of different clothing styles are possible from one bolt of fabric, but certain shapes and structures crop up again and again. Burnham deconstructs how different fabrics had to be disassembled, in order to be reassembled with the least amount of waste.

After I consulted Burnham’s book, I was able to make this rough outline of my assembly/disassembly process. The fabric itself was nearly 58″ wide, so I was able to put the shirt body in one half of the folded fabric, shown in black with white text; and the sleeves, collar, cuffs, armscye gussets 1 and 2, and the 12-14 squares of reinforcing material (in green) came out of the other side (including a few extras in case I screw up). There was enough left over on the right hand side of the chunk for a small handkerchief or two, I think.
There’s a possible failure here. I’m told that the grain line of the sleeves should probably be the same as the shirt-body; which means that the sleeves are probably oriented the wrong way relative to the shirt body panels. Some tailors can tell the difference between the grain line and the ‘sideways grain’, and some can’t. It’s not always obvious to the casual observer, but the fashionista can probably tell, too. So, we’ll make this shirt this way, and save the remaining fabric for trying to do it “the right way” — with the sleeves and the shirt body oriented in the same grain-direction.
Next steps soon.

[…] been working on this shirt for a while. Here are the earlier installments: i, ii, iii, iv, v, vi, vii, vii, viii. The whole project was inspired by Bernadette Banner’s […]