I’ve been making tool rolls again. They’re fiddly and annoying in some ways, but they’re also so satisfying when you fill them with tools.  I like the way that bright colored pencils look when you fill up the tool roll. I don’t usually sell them like this, pre-loaded with pencils or pens. I know someone who filled his with knitting needles, another person filled hers with cosmetic brushes.
These are going to start out as pencil cases, but I imagine they’ll become something else to their eventual owners. I don’t want to give just the roll to the recipients, without the contents, so I found some pencils to put in them before I wrap them as Christmas presents, Hanukkah presents, or Solstice presents.
A lot of stuff that I make this time of year, look like they’ll be turned into holiday presents of some kind. I have to figure out how many of them I’ll be able to make, though, and how many I want to give away.
How to make them
Each tool roll is pretty simple. They’re two fat quarters, trimmed to a reasonable size and so they match one another. They’re sewed together, right sides facing each other, with a 5/8″ seam, with two ‘turning holes’ on the opposing short sides. The bag is turned, ironed flat, and then the trimmings from the fat quarters are sewn together to make the strap for binding the roll on the outside; and strap on the inside to hold the tools in place. 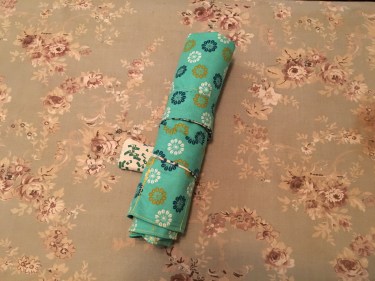
Sewing the pockets for the individual tools is annoying — but my recommended method is to put the tool in the place where you want the pocket to be, and put the tool to the right of your sewing machine foot. Use the tool itself as guide for how wide to make the pocket. Don’t sew the pocket, and the retaining strap, at the same time. Move tools around each time you complete a pocket.
And, of course, vary your fabrics. You’re not attaching individual name tags, so you want each tool roll to be distinctive and unmistakeable. All your tool rolls should look similar to one another in form, but be different in fabric.
 For example, the red and black one on the right in this last photograph, could be made in all black; in black with red backing (as shown), in black with a red strap, or with black with a red strap with black backing showing. Four ways of making the same item, more or less, with only two fabric choices. Lots of things are possible.
OK, back to work for me.

[…] often compared with the Tool Roll, as a favorable alternative. Why? you might ask: and the answer is simple: where a tool roll […]
This is pretty awesome